I just purchased this incredible file set from KaDoodle Bug Designs and immediately knew what I wanted to do with it. My little man Aiden loves to make snowmen and last year we did not have enough snow to do that. So here is hoping this year he will get that chance. This will be his Christmas card for 2012.
This is the outside of the card with the girl bunny carrying a large snowball. The card base is made out of a simple blue piece of cardstock and another piece of cardstock for the hill. The words were written using my pen tool for my wonderful Black Cat Cougar and then cut it out by replacing the blade housing. I love my Cougar!
And here is the inside with the boy bunny getting ready to put the hat on their snowman! I cut all pieces for the bunnies, snowman and snowballs on one 8 1/2 x 11 piece of white cardstock and then played with markers and my colored pencils and mineral spirits. Had I been thinking I would have done the majority of the coloring before taking all the little pieces off the mat .... oh well, my fingers are multi-colored now, which shows I have been crafting today! :)
Thanks for stopping by.
Kathy
You can get this wonderful file set here at KaDoodle Bug Designs - it is called Winter Snow Buddies
I love to create cards, layouts and other unique items with my Black Cat Cougar and Make-the-Cut software!
Showing posts with label Cards. Show all posts
Sunday, October 7, 2012
Saturday, October 6, 2012
Two more Halloween Cards
I accomplished one more Halloween card today and found one I forgot that I made a few weeks back.
The one I made a few weeks ago is another new favorite from SVGCuts
This card is available in the Midnight Jamboree SVGCuts set. The sentiment on the moon is from the Fright Night Phrases stamp set from MyThoughtsExactly.com (another favorite place of mine!). I used a glittered black paper that I have been hoarding for almost two years for the sky sectoin and the brim of the witch's hat. Here's a trick, to not dull your blade so fast, turn glittered paper over on your mat so the glitter is face down and flip your file so that when you take it off the mat and turn the paper over it is facing the correct way. Also, instead of trying to put enough force to cut through the glitter paper once just repeat the cut at your normal force - again saves on your blade.
The second card I finished today is the Spooky Pumpkin.
The Spooky Pumpkin Title file is available from Melissa over at Kadoodle Bug Designs. I made a shadow layer of the pumpkin and then duplicated that shadow layer, flipped the second one and welded the two together to make the card base. The file is original artwork of Kristi W. Designs.
For the inside I again made a shadow layer of the pumpkin (not the stem and leave this time) and cut two (one flipped). The adorable little ghost is a digi stamp again from the fabulous Kadoodle Bug Designs - you can also purchase the Spooky Pumpkin as a digi stamp or the little ghost as a cutting file. The ghost is also original artwork of Kristi W. Designs.
Well I hope you enjoyed the two new cards. Thanks for stopping by.
Kathy
Friday, October 15, 2010
Halloween cards and Trick & Treats are done and in the mail!
I finished up my Halloween Cards, 21Treat bags and 7 Tricks and got them in the mail today (some will be hand delivered)! I realized this evening I forgot to take a picture of one of the cards that I mailed off, oh well. Here are the last of the cards, the Tricks and the Treats. Now I can start focusing on Christmas and maybe have those done before Thanksgiving :)
![]() | ||
| This little guy came from Scrappy Dew's Halloween Palz Bundle Set |
![]() | ||
| Now for the funny part of this card. Notice the little area for writing is on the top? Well I had not attached the cute little guy on the front yet when I was working on the inside. I used a pop up card from SVG Cuts Premium Pop Cards Collection, got the pop up attached, and then put on the area to write on. It's all glued down and ready to go. I close the card to attach the bat and discovered I did this upside down!!! Hmmm now what to do. I carefully removed the circle pop up and put it back on the other direction and then slapped on a bunch of stickers. LOL - salvage the card! |
![]() |
| This digi stamp (Casandra) came from Simply Betty Stamps Spooky Hallow Collection. I used Crystal Stickles at the tip of her wand to create a little "spark" |
![]() |
| I really do love this witches hat from SVG Cuts. I forgot to put the hat band on but it still looks cute! I used Perfect Pearls (silver) on the flower to give it a little more depth. |
![]() |
| Hoping my granddaughter likes this one in pink! |
![]() |
| Goodie bags -- 21 goodie bags! Now you must know that a 3 year old does NOT understand why he cannot have the candy that I was putting in all these bags! |
![]() |
| The goodie bags cut file came from SVG Cuts Sweet Treats Bag Collection. The witch I made by joining a silhouette of a witch on to a plain bag file. The tags are from SVG Cuts as well ( a freebie file!). The candy corn is from a necklace that I found at JoAnn's for a buck! I just clipped the string and took off the wooden pieces of candy! They attached real well with Glossy Accents |
![]() |
| This bat bag is from the SVG Cuts files. The cat peeking out of the pumpkin is another wooden piece taken from a necklace that I picked up at JoAnn's for a buck! |
![]() |
| Here is a shot of the other bag I used, this is a scallop cut out in the SVG Cuts collection |
![]() |
| Now the TRICKS! |
![]() |
| Each of the kids are getting one of these! |
![]() | ||
| I took a piece of printed cardstock, wrapped them around a pair (or two) of socks and taped it together. Then I stuck two Halloween pencils down into the socks and attached the little topper. The topper was cut in MTC from my gallery of basic shapes! |
Tuesday, October 12, 2010
Lets try this again
I guess my blog had a spasm and would not let me finish the last post. So here are the last few cards for tonight.
Well that's it for cards tonight. I hope to get these and the treat bags finished tomorrow! I have a lot more things to be working on but have to finish up Halloween goodies for the family first!
![]() | ||
| This cute card is from SVG Cuts Haunted Hemlock Cards set. In the top picture you can see the little cat I added to the fence. I used glossy accents on the moon and the windows with moonshine in them. |
![]() | ||
| This fantastic digi stamp (Morticia) is from Simply Betty Stamps Spooky Hallow Digi collection. Thanks to some great tips from Cheri at Graphicat Creations I was able to cut all the little areas of Morticia. |
![]() | ||
| A cute chipboard embellishment finished off the Morticia card on the inside. |
![]() | ||
| And this cute, cute, cute witches hat card is another one in the Haunted Hemlock Cards collection at SVG Cuts. I used 3D Crystal Color Lacquer on a plain white card stock cut out of the buckle. Love the way it looks wet. Some stickles on the stars to give a little more bling. |
And more Halloween Cards
I have been working hard to get the last of the Halloween cards made plus a slew of treat bags. Below are five new cards -- only five more to go!!! I have 9 of the treat bags done, 12 more to go! I'll post a few pictures of those when they are done. Hope you enjoy these!
![]() | ||
| I used the same spooky tree that I got from the MTC Gallery for this one. Pretty basic with a few stickers. Haven't decided what I am going to do on the inside yet LOL. I'm interested to see what folks think about this one. |
![]() | |||||||||||
| This is Marvin the Bat, he is so darn cute. I picked up this digi stamp and two others of Marvin from The Stamping Bazaar. I fussy cut around him (leaving a little white cardstock and used my bic fine point markers to color him in. |
Sunday, October 10, 2010
More Halloween Cards
Pictures of more Halloween Cards I made over the past few days -
![]() |
| For the life of me I cannot recall where I got the card front for this. It came in a set of three card fronts (the ghost, the skull and house both shown below). If anyone knows where these are from I would appreciate you letting me know so I can give credit to them for these card files! I cut the front out of orange card stock and then chalked and glossy accented the ghost. As I started to ink the edges of the orange card stock my three year old bumped into me and I smeared black ink across the front, so I just added more smears LOL. A few blings to the front and I was happy with it. |
![]() |
| Inside of the Ghost card is the "Boo" pop up from SVG Cuts. This is part of their Premium Pop Up Cards collection! The cat stamp at the top is one I picked up in a set of clear stamps at Joann's. |
![]() |
| Again this came from the trio of card fronts that I cannot recall where I got it from. I love this card front. Simply cut out the main part in black and the moon piece in yellow and adhered to an orange card base! A simple pop up sticker "October 31st" and ta da! |
![]() |
| Inside of the haunted house card is a simple dimensional sticker and scalloped frame to write on. |
![]() |
| My 18 year old daughter will be getting this one - It is so her! LOL I stamped a spider web and spider on with "Perfect Medium" and then brushed over it with a silver "Perfect Pearls" to showcase it on the front. Again this is from the trio of card fronts that I don't know where I got them from :) |
![]() |
| Inside of the skull card I used yet another file from SVG Cuts . This is a simple oval pop up from their Premium Pop Up Cards Collection. If you haven't checked these guys out you sure should. All their files are in SVG but they seperate everything so you don't have to do any breaking apart or such if you are a Make The Cut software user like me! |
![]() |
| And here again is another card base from SVG Cuts. This time I used one of their Breezy Backyard Lever Cards set. The cute witch is from Rob over at Scrappy Dew . I made the "Witching You A" in MTC. If you want a file of the text let me know. I threw on foam stickers of a bat and a cat to finish off the front. |
![]() |
| Added some halloween paper from K&Comany and a couple of foam pumpkin stickers to finish it off. |
Haunted House Card
I got this idea from Paper Crafts Magazine Sept/Oct issue. Using an A7 card as the base I cut 1 inch circles of 7 different papers. Starting at the top of the card base I placed the first set of circles and then layered on top working my way down the card base. *I ran out of colors for the gradient scallop and had already put my E away for the night so I used some additional circles of colors I had already cut at the bottom* The haunted house is one of my files. I will post it after this post. The tree is from the Make The Cut Gallery but a popular tree punch of other tree would work just fine if you don't have MTC. The bat flourish at the top was a free file from the fabulous Mary and Leo at SVG Cuts. Please leave me a comment to let me know what you think!
Thursday, June 10, 2010
Another card made
I purchased a wonderful card svg file set from SVGCuts and made this birthday card and envie for my boss. She LOVED it! :) One of my faux skittles is on the center of the fan housing and a few scattered around on the outside and inside of the card. I made these first faux skittles using a hot glue gun and alcohol inks.
Using a card file from the incredibly talented Wanda I made the card above for my niece Jackie's graduation! Thanks Wanda for sharing your wonderful talent with all of us! The tag was something I already had, the pearl on the tag is one of my faux pearls made with a hot glue gun and perfect pearls powder. The tassels on the grad hats have stickles on them.
Saturday, April 24, 2010
crafting cards
I have started working on putting a few cards together for the craft fairs this fall. The wreath card below was the first. My friend Debbie has been helping me get digi stamps ready for cards as well. This is one of the first cards with a digi stamp on it (sorry I can't recall where I got the digi stramp right off the top of my head right now. The card base is from the incredibly talented Wanda at http://wandascrafts.blogspot.com/.
Wreath shaped card
OK I know it is only April but I am working on Christmas crafts now so that I have a large stock pile to take to the craft shows in the fall. Below is my Christmas Wreath Shaped Card MTC file. I have cut it and like how it turned out. The picture below is my quick cut of this file. Have a great night everyone!
KathyB
Click HERE for MTC File of this
Or HERE for the SVG File
KathyB
Click HERE for MTC File of this
Or HERE for the SVG File
Sunday, March 28, 2010
Busy days, nights, weekends
I have been working on getting things ready for National Telecommunications Week (April 11-17). A lot of things going on at work and trying to decide what I am going to do with my career. Thirteen years in emergency dispatch is a long time, burn out is typically 5 years. I think I am a late bloomer in the area of burn out. Easter cards are made and going in the mail tomorrow.
A few people have requested specific files on some of the groups I belong too. I was able to create a few of them from coloring pages. Plus this past week our challenge was to turn a coloring page into a cut on MTC. Below are a few of the new files. If I don't have an SVG or MTC file of the one you want posted just leave me a message with your email and I will send it to you.
Circus tent MTC here
Circus tent SVG here
(Anyone that knows me and Aiden please note the information on this picture is just written on there to show how information could be put directly on the cut. I know that Aiden is only 2 1/2 and no there is no pizza party at Idaho Pizza on June 12th LOL)
Guy Bowling MTC Here
Guy Bowling SVG Here
I think my son-in-law may want something like this (no gray hair though) as he is the avid bowler in the family.
Frog MTC Here
Frog SVG Here
Just a cute little frog (well it's pretty big on the MTC screen but you can shrink him)
Turtle MTC Here
Turtle SVG Here
For my sister the Turtle :)
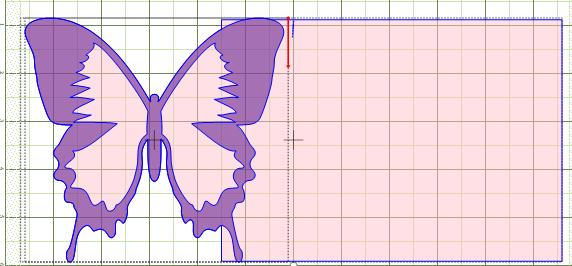
KathyB's Butterfly card MTC here
KathyB's Butterfly Card SVG file HERE
I haven't cute this one yet. It was my first experience of welding a basic shape to another shape to make a card base. Worked pretty well.
Claddagh MTC here
Claddagh SVG file HERE
I wish I still had my ring that had a claddagh on it.
Well that's about it for now. I'm sure there will be more to come soon. (Amended April 11, 2010)
KathyB
PS I added the SVG files today :)
Subscribe to:
Posts (Atom)